Thursday, March 28, 2013

Irish Ties Make Good Allies


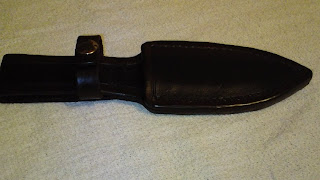
I was asked to make a sheath by a friend in Ireland, but he couldn't send the knife to me for sizing. I knew I could be in trouble, and truth be told...I didn't need trouble. I am new to leathercraft, at least as far as final, polished products are concerned. I have long used leather in projects, and being an ex-carpenter who is *somewhat* proficient with his hands, decided to take on this challenge, too. I mean, it's one thing to make a few sheaths for personal use, another entirely to make one for somebody else. If I mess up, no big deal. But, I couldn't possibly enjoy making a sheath for a friend and not have it work.

Surprisingly enough, I made it work. I trusted in the drawing he sent me, and I got to it. Within the first three hours I nearly had it completed. I actually enjoyed making this sheath more than making them for myself! I sent it off to Ireland after a nice treatment of mink oil was applied. I love this sheath design. It has black and brown dye, a nice edging all around, fine hardware and hand sewn to perfection. His custom bushcraft knife looks great in this sheath.

The trick now, was to wait for Ireland to respond...and so I waited...and waited...and waited...

No. It wasn't too long of a wait. Deccied sure had some fun toying with me like that, though. ;)


Sheath for a Classic Mora

 This sheath is for my classic Mora, which is by far my favorite carving knife. I love the Scandinavian grind and razor sharp edge. I started with 9 oz. vegetable tanned leather and laid out a basic template. I knew I wanted a ranger carry option, but also decided to leave a simple belt option, so I notched that at the top.
 Using Chicago screws on the straps will keep it modular and easy to maintain. Some blue Locktite will assist in keeping them from opening any time soon. I went to wet forming, and the blade was easy to manage in the leather. After cutting the weld, gluing and dyeing, I hand stitched it with the usual wax coated thread.
  
A closer look at the sheath with knife will illustrate some effects from careful burnishing. I use a simple burnishing tool, wet the leather lightly where I intend to do the work, and start rubbing without too much pressure.

The final sheath is very nice with a friction fit.I actually made an additional, wide strap which goes behind the sheath and snaps into place at the top to allow me to carry the knife in traditional manner, but with the added benefit of having very wide room for my military belts. It can be easily popped off by un-snapping it.

Leather Sheath for a Llewellyn Blade

  
This is the first "official" sheath I made. I used a sexy 9 oz. vegetable tanned piece of leather, died it with Fiebing's professional black oil dye and it is hand sewn.

I wanted to keep it simple, so I used a pattern that would incorporate the firesteel. The one pictured is temporary; I have a larger firesteel I will use which will fit it beautifully. Take a look at those rivets, oh my that's pretty...

You can tell the logo I stamped is generic, but it's a skull, so I am pleased. One day I can order a custom stamp, maybe. The knife is a custom blade made by an acquaintance from the Survival Monkey, named Valkman (Don Llewellyn). He lives out in Las Vegas, but doesn't make blades any more. I also own one of his fighter blades made out of CPM 154 steel. I paracord wrapped this one, though.

See more here at my YouTube Channel: